On-site analysis of your HVAC system, current duct system, and home design.
Step 2
Heating and cooling calculations and measurements will be taken. Your new PureflowSM system is designed by a certified Indoor Air Quality Specialist.
Step 3
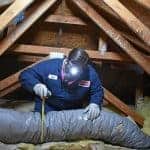
Your home will be prepared and protected with drop cloths, and your existing ductwork will be bagged and sealed.
Step 4
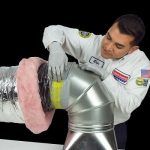
The inner barrier of the duct is pulled over the metal connector, and secured with a high-tension draw band.
Step 5
A coat of fiber-reinforced sealant is applied to the joint, followed by a layer of mesh tape. Another coat of sealant is then applied over the mesh tape.
Step 6
The gold-certified formaldehyde-free insulation and the outer reflective radiant and vapor barrier are pulled over the sealed connection and secured with a draw band.
Step 7
All seams on the metal connections are then sealed with the fiber-reinforced sealant.
Step 8
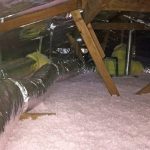
Additional foil backed insulation is added over any exposed metal ensuring the temperature and humidity in your attic doesn’t affect the air coming into your home.
Step 9
Adjustable airflow dampers will be installed in your duct system for proper air balancing.
Step 10 & 11
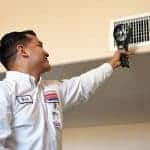
Every airflow supply connection is sealed with a high pressure material and new adjustable multi-directional air registers are installed for proper air distribution.
Step 12
A duct air balance is performed to ensure that every room in the home gets balanced heating and cooling.
Step 13
Duct pressure test is performed by a third party to ensure duct tightness and energy savings compliance.
Americans with Disabilities Act (ADA) Notice
At Service Champions, we are committed to ensuring that individuals with disabilities enjoy full access to our websites. In recognition of this commitment, we are in the process of making modifications to increase the accessibility and usability of this website, using the relevant portions of the Web Content Accessibility Guidelines 2.0 (WCAG 2.0) as our standard. Please be aware that our efforts are ongoing. If at any time you have difficulty using this website or with a particular web page or function on this site, please contact us by phone at (714) 584-6399; or email us at (maintenance@servicechampions.com) and place “Web Content Accessibility (ADA)” in the subject heading and we will make all reasonable efforts to assist you.